Now that you have used Simplify3D to slice your project into a “.gcode” file, it is time to upload the file to the MakerGear 3D printer.
In this article, you'll learn how to:
- Save a “.gcode” file from Simplify3D to your computer.
- Send a “.gcode” file from your computer to the OctoPrint files station.
- Begin printing a “.gcode” file directly from the OctoPrint interface
Before you begin, ensure that you have already completed the following steps:
- Log into the OctoPrint for MakerGear interface and connect to your MakerGear printer (either via wireless or via ethernet).
- Install Simplify3D software.
- Run the Simplify3D configuration assistant.
- Download the correct profile for your material of choice.
- Convert a “.stl” file to a “.gcode” file using your material profile of choice.
Saving a ".gcode" file
Now that you have successfully sliced your .stl file into“.gcode” file, let's upload it the MakerGear 3D printer.
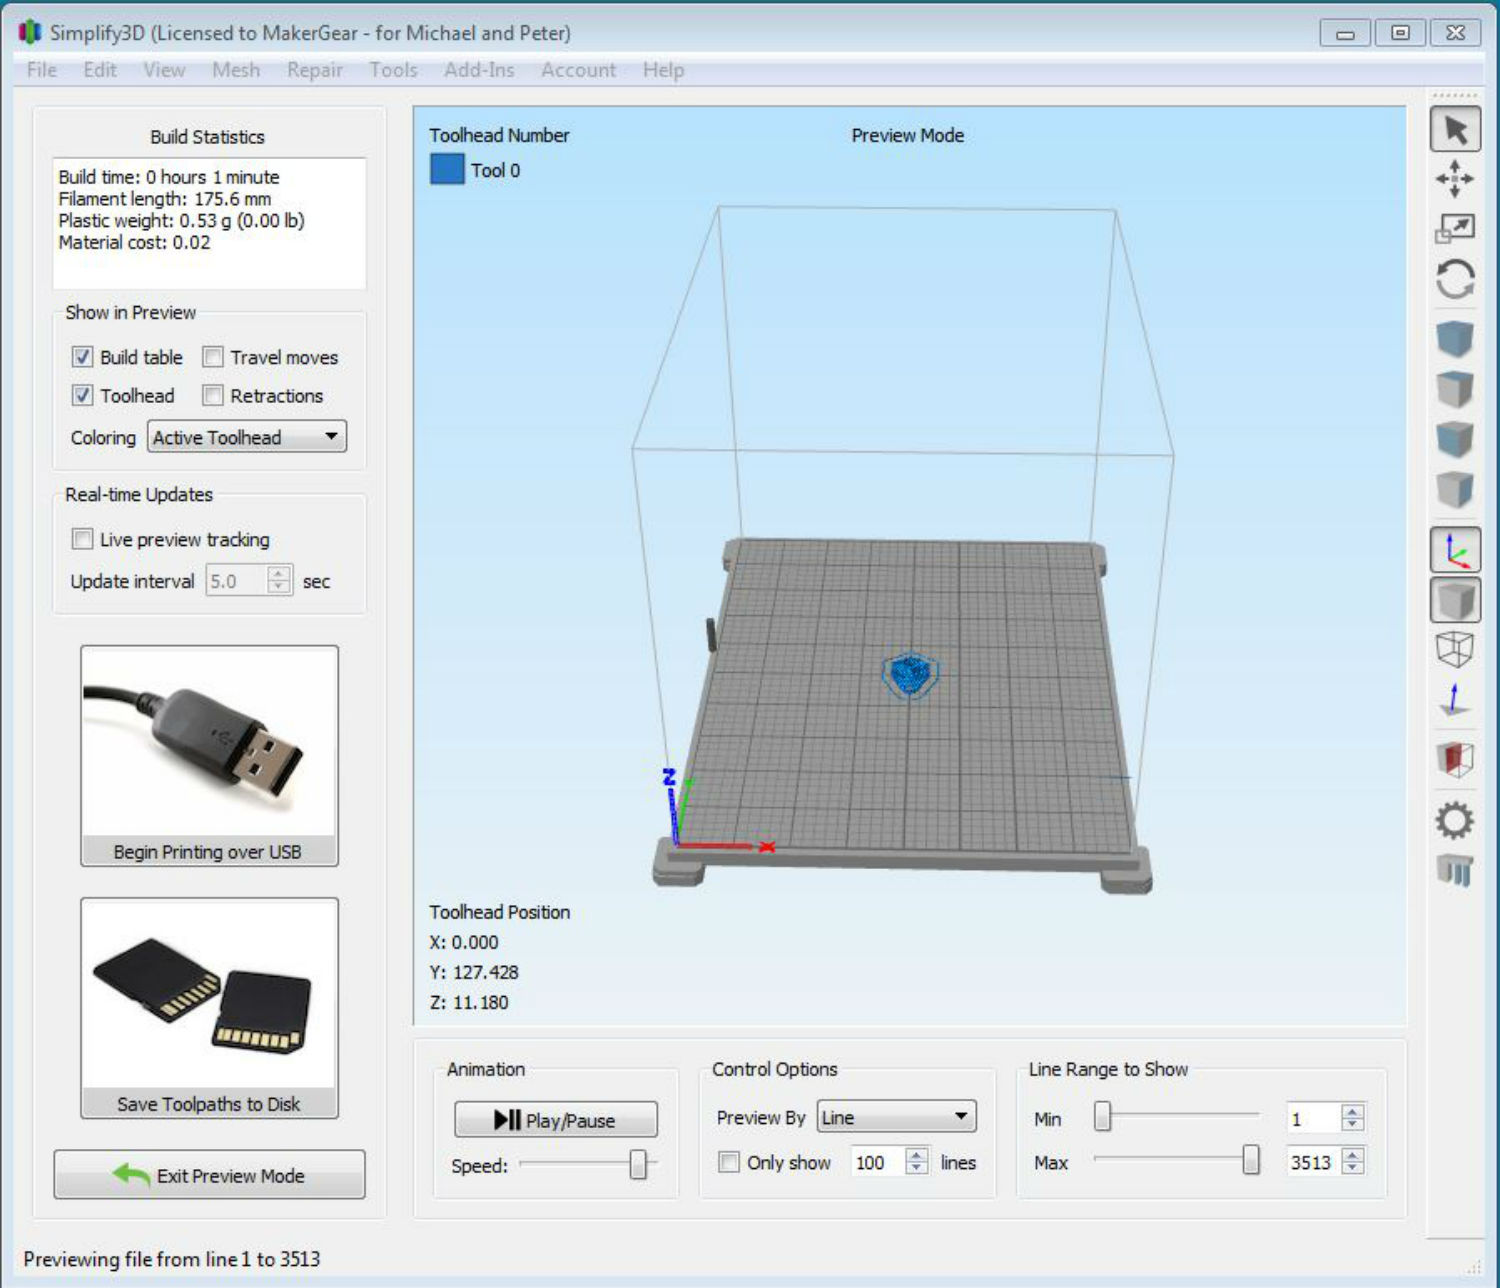
By selecting “Prepare to Print’ in Simplify3D, the .stl file is converted or "sliced" into a “.gcode” file. Notice that the color of your project has turned from yellow to blue. This is one of the ways you know you are looking at a“.gcode” file in Simplify3D. There are two sliders in the “Line Range to Show” box at the bottom of your screen. If you move the bottom slider you will see , in reverse, the path that the extruder will take when printing a project.
Notice the “Save Toolpaths to Disk” button. This will open a window and let you save the “.gcode” file to the hard drive. It doesn’t matter where you save it as long as you know where it is.
Send ".gcode" file to OctoPrint
Using your web browser, ensure that you are connected to your printer via OctoPrint. You should see the following in the column on the left-hand side of the OctoPrint for MakerGear interface:
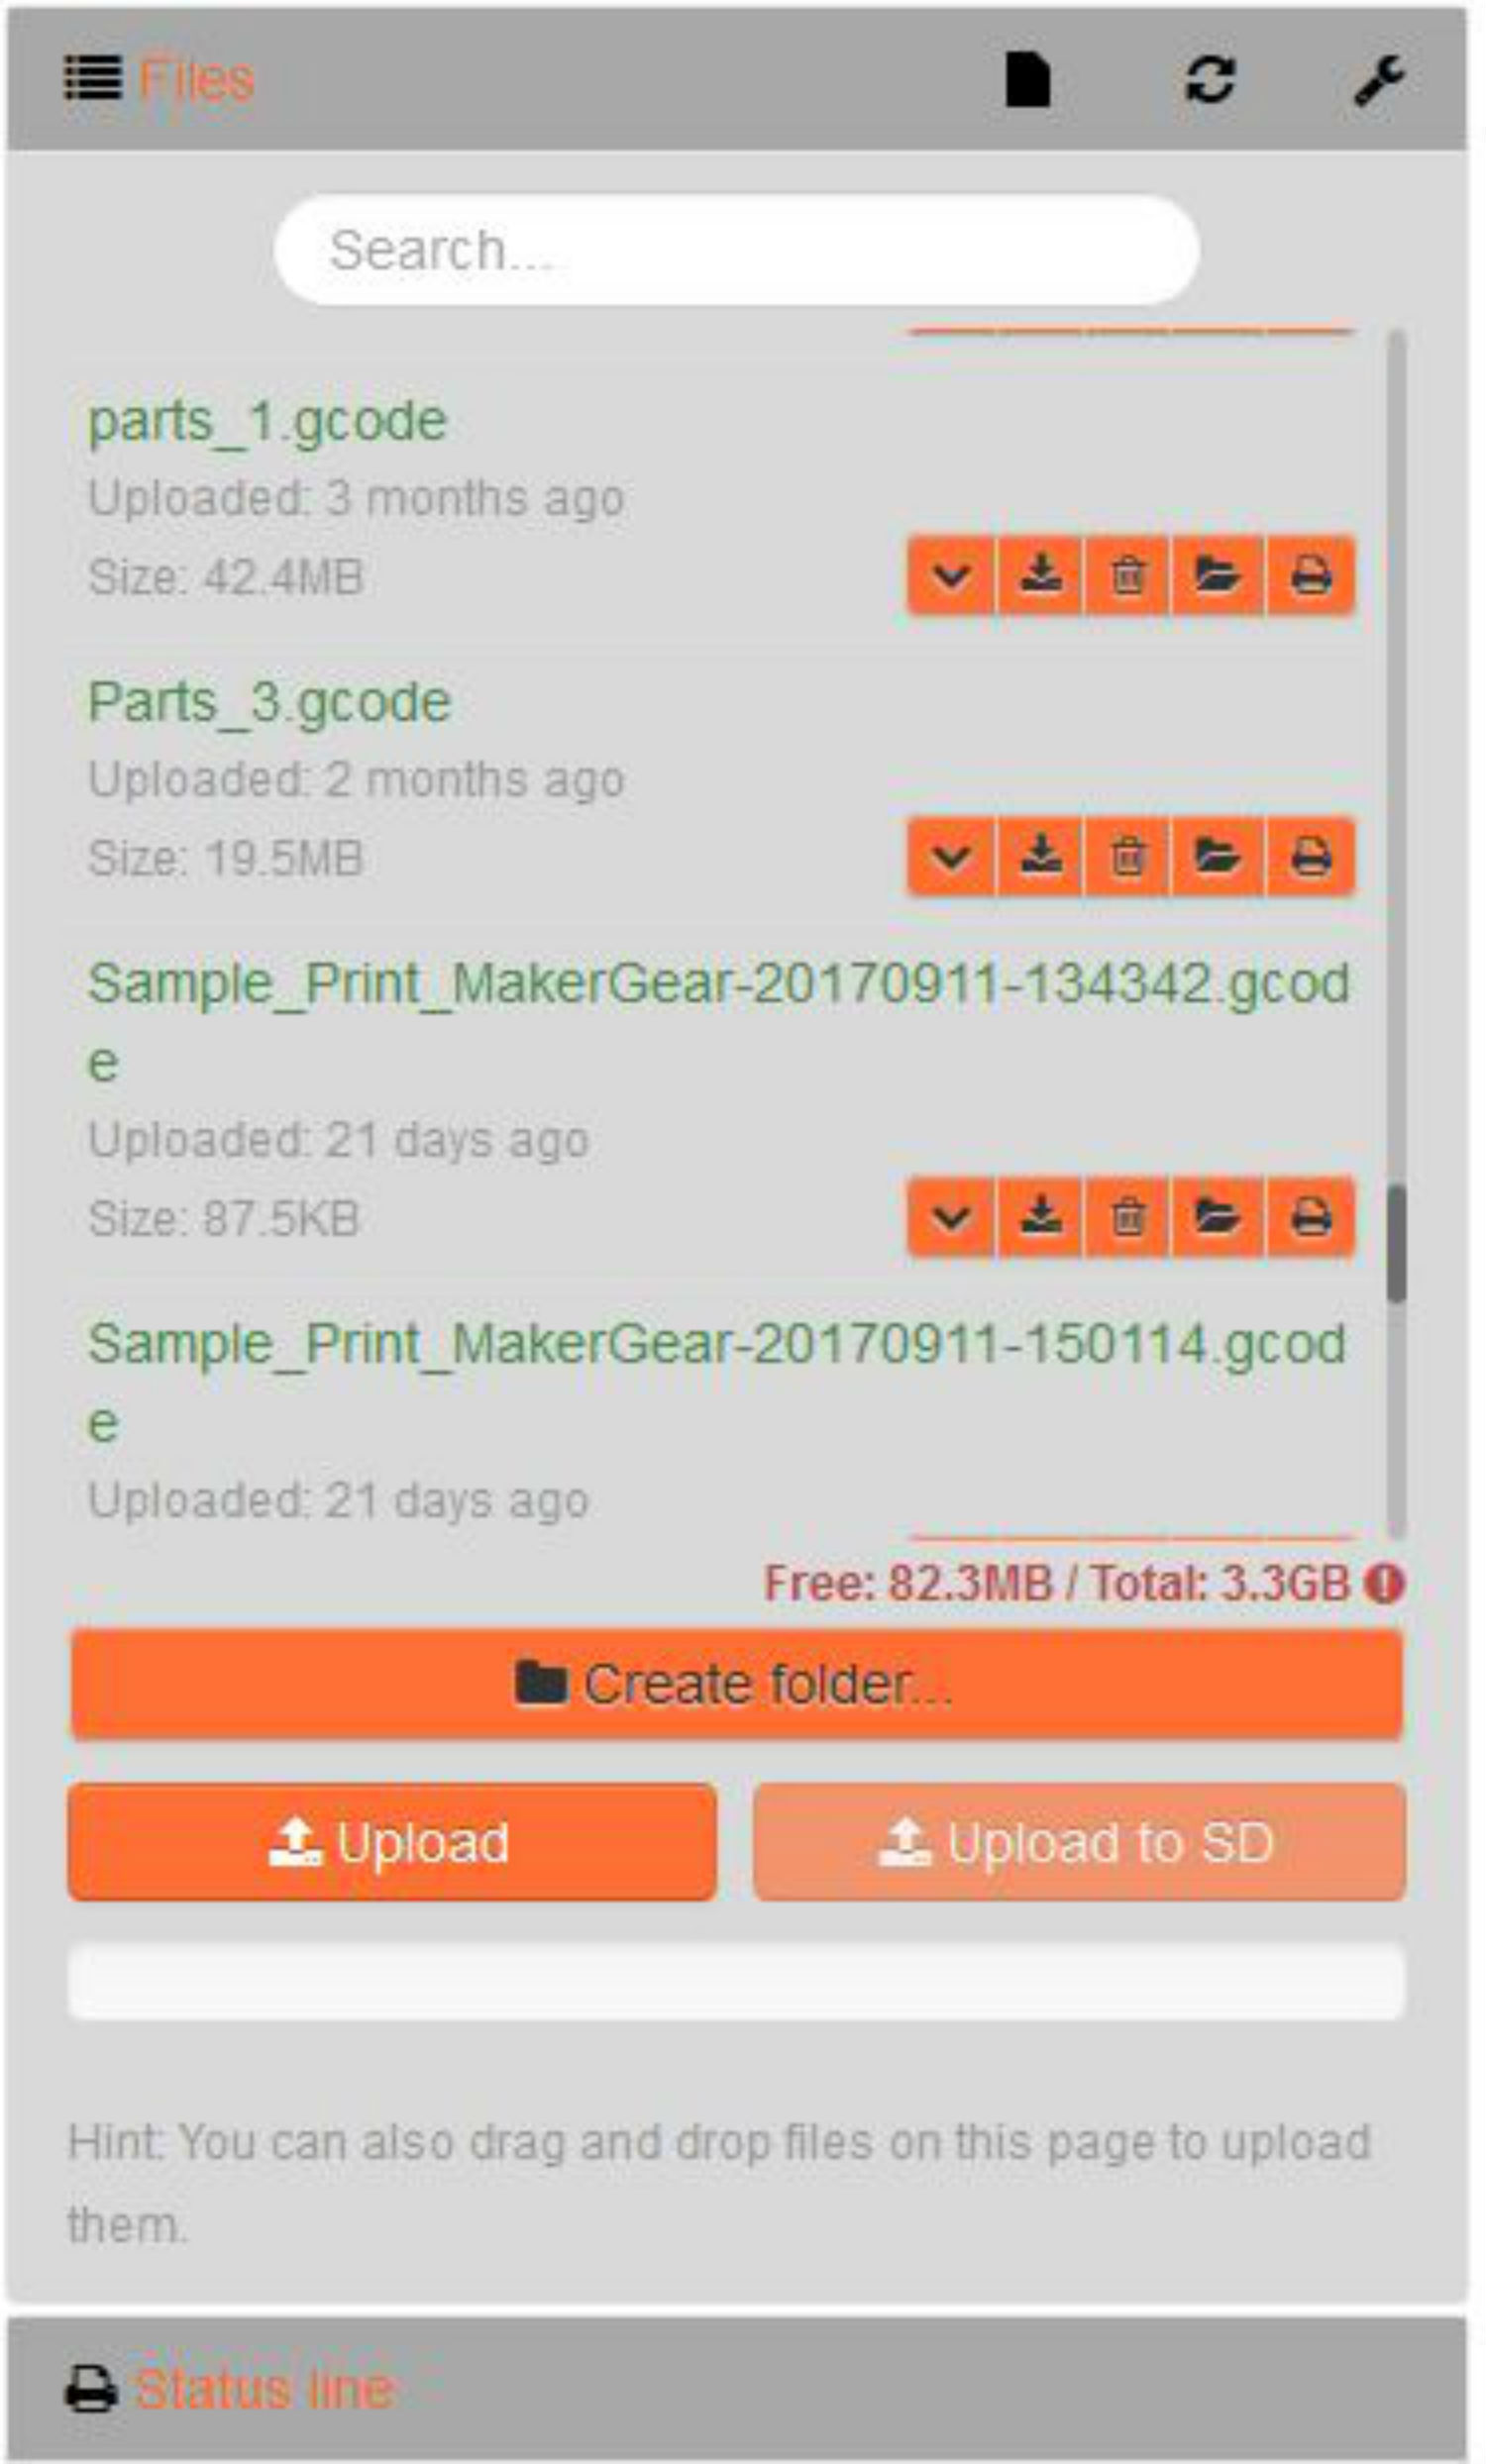
You can drag and drop your file directly to your file station for ultimate convenience, or you can utilize the “Upload” button and select the “.gcode” file that you would like to upload. Your project will now be saved to the MakerGear's on-board computer.
Notice that files are listed in chronological order. As you can see, your recently-uploaded project is now at the top of the print queue and ready to print.
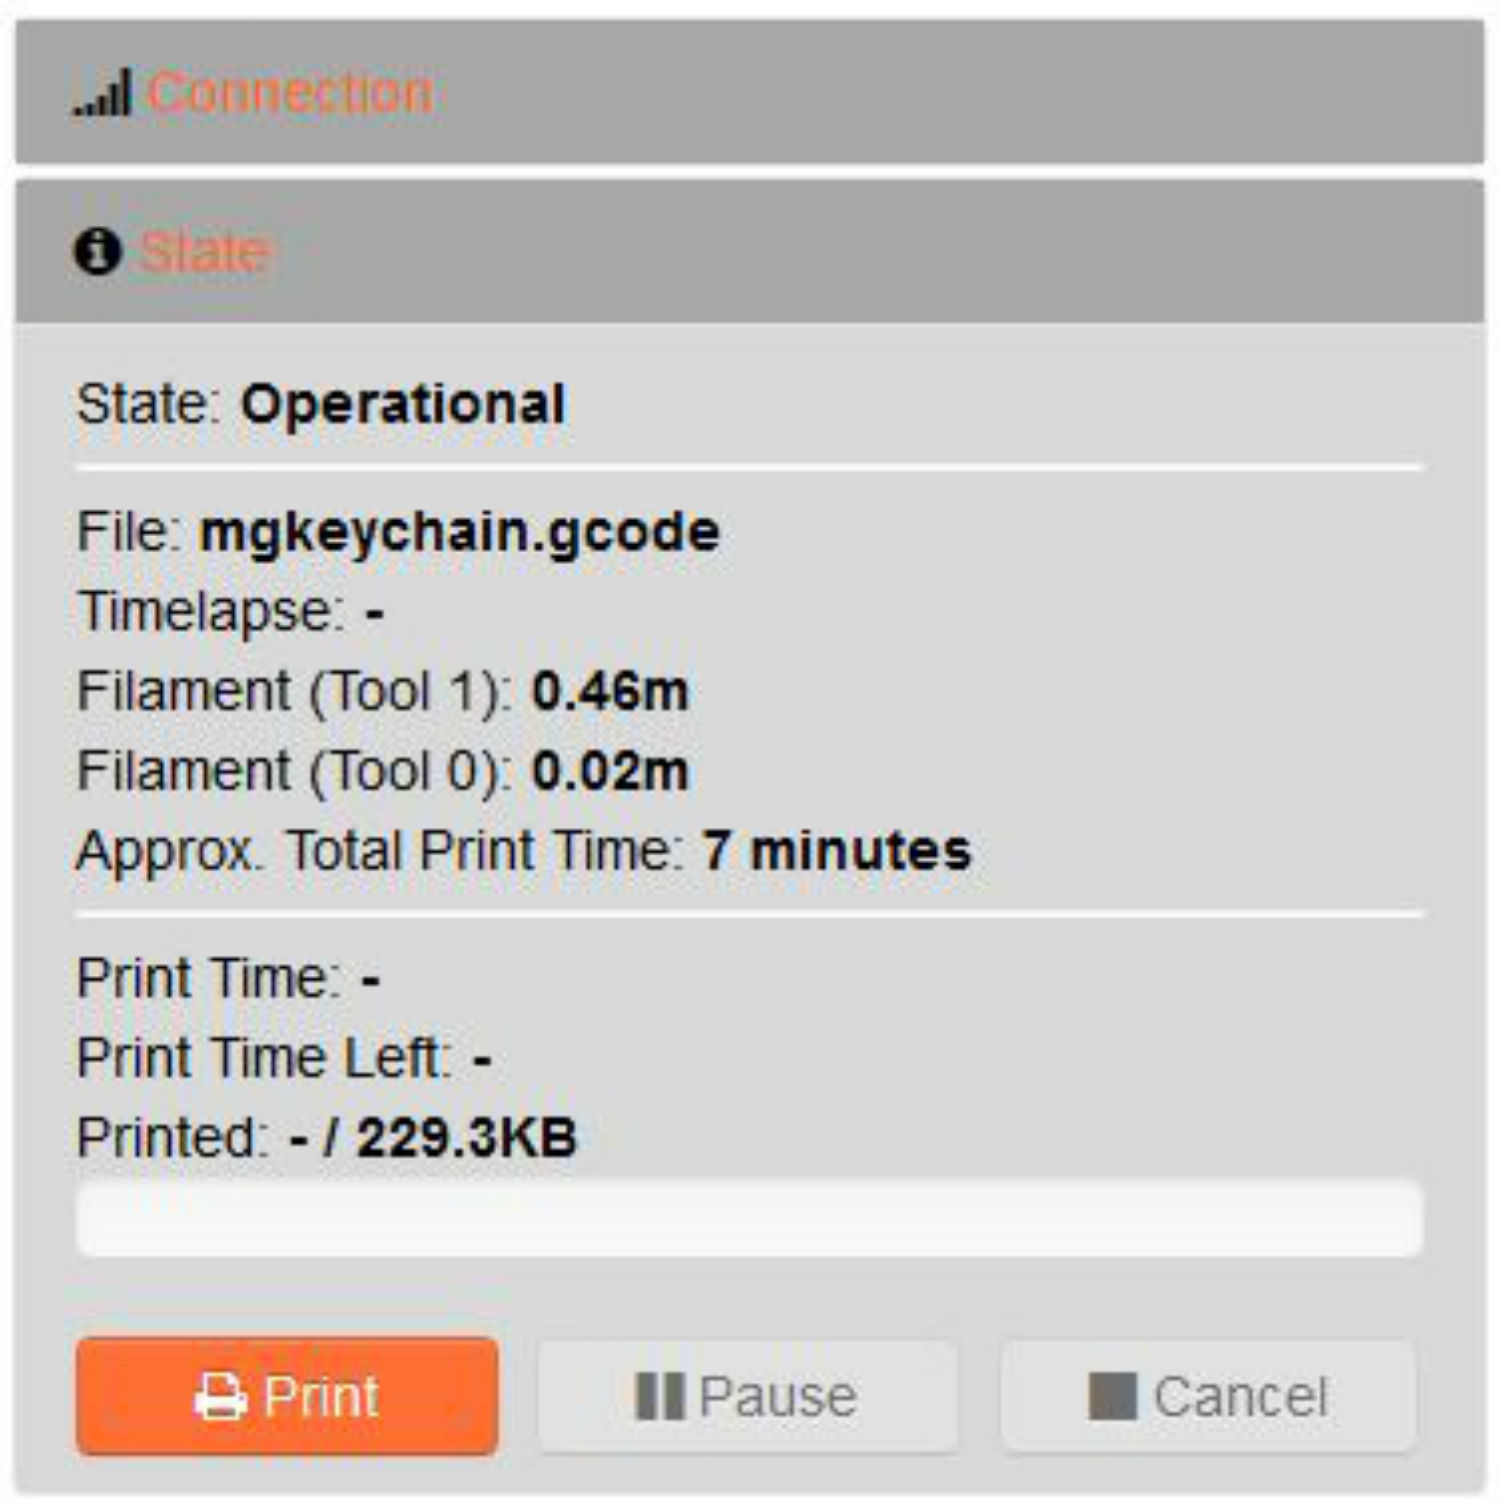
Begin printing
To print the project, simply click the button with the printer icon. Now the printer will begin heating the extruder(s) and the HBP to the proper temperatures. Once the printer has reached its target temperatures, it will begin to print the selected file (4-20 minutes, depending on target temperatures and ambient conditions).
It is good practice to watch the first layer of a print in order to make sure the extruded filament adheres to the build plate. If you experience issues with first-layer adhesion, click the “Cancel” button to stop the print. There may be a small delay between hitting cancel and the print actually stopping. To troubleshoot this issue, ensure that the glass build plate is free of debris and defects, and that your extruder is set to the proper starting height.
Note: Many users prefer to preheat the extruder(s) and HBP prior to file preparation in order to avoid downtime. All MakerGear-supplied profiles for Simplify3D and the OctoPrint Slicer plugin require the printer’s temperatures to stabilize (i.e. finish heating) before it will begin printing. If you are using a different slicing program or have disabled the temperature stabilization command, you must preheat the printer in order to avoid machine abuse.
Once the print is complete, the printer will then shut down all heated components after making a sound to indicate that the project has finished printing.
Explore our MakerGear Knowledge Base to learn more about OctopPrint and other features of your MakerGear 3D Printer.